If your local AI takes 30 seconds—or even several minutes—to answer a simple prompt, you’re not alone.
Whether you’re using Ollama, LM Studio, Open WebUI, or another local LLM platform, slow performance is one of the most common problems users face after installing their first AI model.
Many people immediately assume one of these things:
- “My computer isn’t powerful enough.”
- “I need a better graphics card.”
- “The AI model is broken.”
- “Local AI is just slower than ChatGPT.”
In reality, none of those assumptions are always true.
After analyzing how local large language models (LLMs) perform on consumer hardware, one pattern appears repeatedly:
Most performance problems are caused by configuration issues—not hardware limitations.
A model that’s too large for your available memory, an oversized context window, Windows using the page file instead of RAM, incorrect GPU settings, or simply choosing the wrong quantized model can all make a powerful computer feel surprisingly slow.
The good news is that many of these issues can be fixed without buying new hardware.
In this guide, you’ll learn:
- Why your local AI is responding slowly.
- How to identify the real performance bottleneck.
- The 12 most common causes of poor LLM performance.
- Practical fixes that actually improve response times.
- How to choose settings that match your computer’s hardware.
By the end of this guide, you’ll be able to diagnose your own system, apply the right optimization, and get significantly better performance from your local AI setup.
Quick Answer
If your local AI feels slow, the cause is usually one of these:
- The AI model is too large for your available RAM or VRAM.
- Your GPU isn’t being used correctly.
- Windows has started using the page file because memory is full.
- Your context window is much larger than necessary.
- You’re running an inefficient quantized model.
- Your storage device is slowing model loading.
- Background applications are consuming valuable system resources.
Rather than trying random tweaks, it’s important to identify which bottleneck is affecting your computer first. The rest of this guide will help you diagnose the problem step by step and apply the correct fix.
How to Diagnose Your Slow Local AI in Under 60 Seconds
Before changing settings or downloading a different model, answer these questions.
| If you notice… | The most likely cause |
|---|---|
| Responses are slow immediately after loading the model | The model is too large for your hardware |
| Responses become slower during long conversations | Context window is too large |
| GPU usage stays close to 0% | GPU acceleration isn’t working correctly |
| RAM usage reaches almost 100% | Your system is running out of memory |
| Disk activity remains constantly high | Windows is using the page file instead of RAM |
| CPU remains at 100% while GPU is idle | Inference is running on the CPU |
| Everything on Windows becomes sluggish | Memory pressure or excessive swapping |
Once you’ve identified the symptom that best matches your system, you can jump directly to the relevant section below instead of trying every possible solution.
Reason #1: Your AI Model Is Too Large for Your Computer
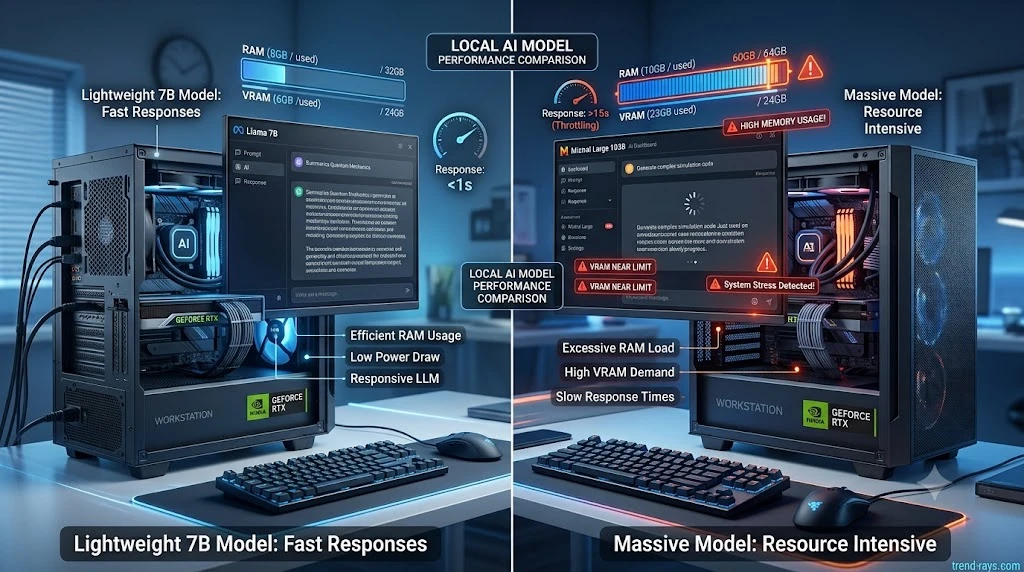
For most users, this is the single biggest reason local AI feels painfully slow.
When you download a large language model, it doesn’t automatically adjust itself to your computer’s hardware. If the model requires more RAM or VRAM than your system can provide, your computer starts compensating in ways that dramatically reduce performance.
Instead of generating responses smoothly, the AI may:
- Take 30–90 seconds before producing the first word.
- Generate only a few words every second.
- Freeze temporarily while loading.
- Cause Windows to become sluggish.
- Force the system to use the SSD as virtual memory.
The result is an experience that feels far slower than expected—even on relatively modern hardware.
Why This Happens
Every local AI model requires memory to store:
- Model weights
- Active context (your conversation)
- KV cache (used to remember previous tokens)
- Temporary inference data
If your available RAM or VRAM isn’t sufficient, Windows begins moving data between RAM and the storage drive (page file or swap space).
While RAM transfers data in nanoseconds, even a fast NVMe SSD is significantly slower.
Once swapping begins, response times can increase dramatically.
Signs That Your Model Is Too Large
You may be using a model that’s too large if you notice any of these symptoms:
- RAM usage stays above 90%.
- GPU memory fills completely.
- SSD activity remains constantly high while generating text.
- Responses become progressively slower during longer conversations.
- Windows displays “Out of Memory” warnings.
- Fans run continuously even for simple prompts.
If several of these symptoms sound familiar, the model size—not your processor—is likely the primary bottleneck.
Typical Hardware Requirements
The exact requirements vary depending on quantization, but this table provides a practical starting point.
| System Memory | Recommended Model Size | Typical User Experience |
|---|---|---|
| 8 GB RAM | 2B–4B models | Basic chatting and lightweight tasks |
| 16 GB RAM | 7B–8B models | Smooth performance for most everyday use |
| 32 GB RAM | 13B–14B models | Excellent balance of quality and speed |
| 64 GB+ RAM | 30B+ models | Advanced reasoning and larger context windows |
These aren’t strict limits, but choosing a model that matches your hardware almost always delivers a better experience than forcing a much larger model to run.
Bigger Doesn’t Always Mean Better
Many beginners assume that downloading the largest available model will automatically produce the best answers.
In practice, a well-optimized 7B or 8B model running smoothly often feels more productive than a 30B model that struggles to generate text.
For example:
- A 7B model may answer in 2–5 seconds.
- A 30B model on the same computer may take over a minute before responding.
Faster feedback usually leads to a much better day-to-day experience.
Quick Fix
If your AI feels slow immediately after loading, try these steps:
- Switch to a smaller parameter model (for example, move from a 14B model to a 7B or 8B model).
- Choose a lower-memory quantized version if available.
- Close memory-intensive applications before launching your local AI.
- Restart your AI software after changing models.
- Test the same prompt with a smaller model and compare response times.
Many users see the biggest improvement simply by choosing a model that’s appropriate for their available hardware.
Expert Recommendation
If you’re using a computer with 16 GB of RAM, resist the temptation to install the largest model you can find.
Instead, choose a well-optimized 7B or 8B model first, verify that your hardware is performing efficiently, and only then experiment with larger models if your workflow genuinely requires them.
In most real-world scenarios, the “right-sized” model delivers a faster, smoother, and more enjoyable experience than the biggest model your computer can barely run.
Reason #2: Your GPU Isn’t Actually Being Used
One of the biggest misconceptions about local AI is that installing a graphics card automatically means your AI model will use it.
Unfortunately, that’s not how local inference works.
Many users spend hundreds—or even thousands—of dollars on a dedicated NVIDIA or AMD GPU, only to discover that their AI software is still running almost entirely on the CPU.
When this happens, response times become dramatically slower because the processor is doing work that should be handled by the graphics card.
Why This Happens
Applications like Ollama, LM Studio, Open WebUI, and similar tools don’t always use your GPU automatically.
Depending on your operating system, drivers, model format, and software configuration, inference may default to the CPU.
Even if only part of the model is running on the CPU, performance can drop significantly because data constantly moves between system memory and GPU memory.
Signs Your GPU Isn’t Being Used
You may have a GPU acceleration problem if you notice these symptoms:
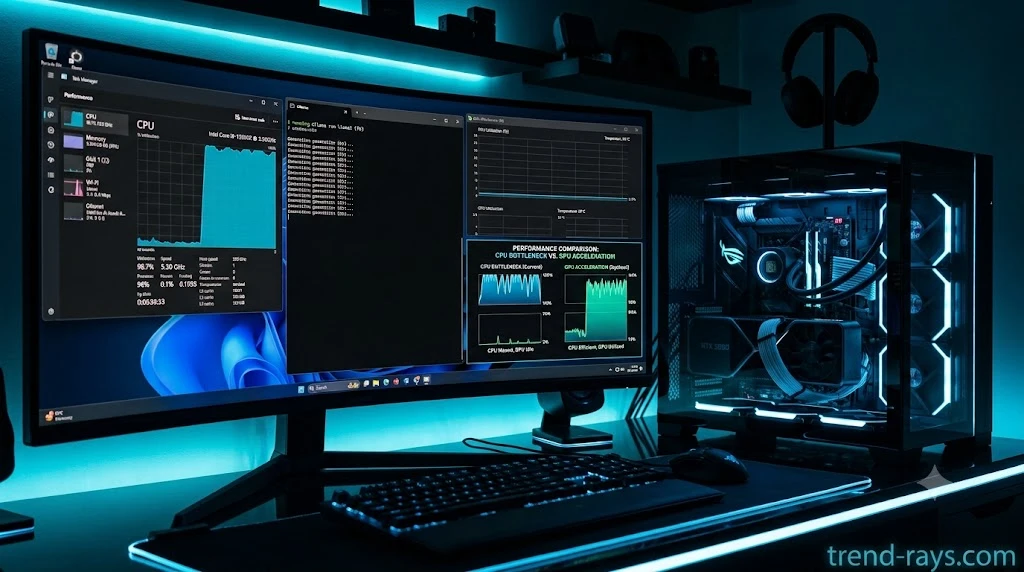
- CPU usage remains between 90–100% during inference.
- GPU utilization stays close to 0%.
- GPU temperature barely changes while generating responses.
- Windows Task Manager shows heavy CPU activity but almost no GPU Compute activity.
- Every prompt takes much longer than expected.
These symptoms usually indicate that your local AI isn’t properly offloading work to the graphics card.
How to Check GPU Usage
Before changing any settings, confirm whether your GPU is actually working.
On Windows
- Open Task Manager (
Ctrl + Shift + Esc). - Click the Performance tab.
- Select your GPU.
- Watch the Compute or CUDA activity while generating a response.
If GPU usage remains close to 0% while CPU usage spikes, your inference workload is probably running on the processor instead of the graphics card.
For more detailed monitoring, tools such as GPU-Z, MSI Afterburner, or NVIDIA’s nvidia-smi utility can provide additional information about VRAM usage and GPU load.
Common Reasons GPU Acceleration Doesn’t Work
Several issues can prevent GPU acceleration.
Incorrect Software Version
Some applications require GPU-enabled builds.
Installing a CPU-only version means your graphics card will never be used.
Missing or Outdated Drivers
Outdated NVIDIA, AMD, or Intel graphics drivers often cause hardware acceleration failures.
Keeping drivers updated ensures compatibility with newer AI frameworks.
GPU Doesn’t Have Enough VRAM
Sometimes the software detects the GPU but cannot load the model because available VRAM is insufficient.
The application then silently falls back to CPU inference.
GPU Offloading Is Disabled
Some local AI applications allow you to choose how many model layers should run on the GPU.
If GPU offloading is disabled—or set too low—the CPU ends up doing most of the work.
Quick Fix
If your GPU isn’t being used, try these steps:
- Verify that your AI application supports GPU acceleration.
- Update your graphics drivers to the latest stable version.
- Restart the application after updating drivers.
- Enable GPU acceleration or GPU layer offloading in the application settings.
- Test with a smaller model that comfortably fits within your GPU’s VRAM.
- Monitor GPU usage while generating a response to confirm that changes are working.
CPU vs GPU Inference
The difference can be substantial.
| Inference Method | Typical Performance | Best For |
|---|---|---|
| CPU Only | Slower token generation and higher system load | Older computers or systems without dedicated GPUs |
| GPU Accelerated | Faster responses, smoother generation, and lower CPU usage | Most modern local AI workloads |
Actual performance depends on the model, GPU, VRAM, quantization, and software configuration, but proper GPU acceleration is often one of the biggest performance improvements available.
Expert Recommendation
Before spending money on more RAM or a faster processor, confirm that your existing GPU is actually being used.
Many users discover that their hardware wasn’t the problem at all—the application simply wasn’t configured to use available GPU resources.
A correctly configured mid-range graphics card frequently outperforms a much faster CPU running the same model entirely in software.
Reason #3: Your Context Window Is Too Large
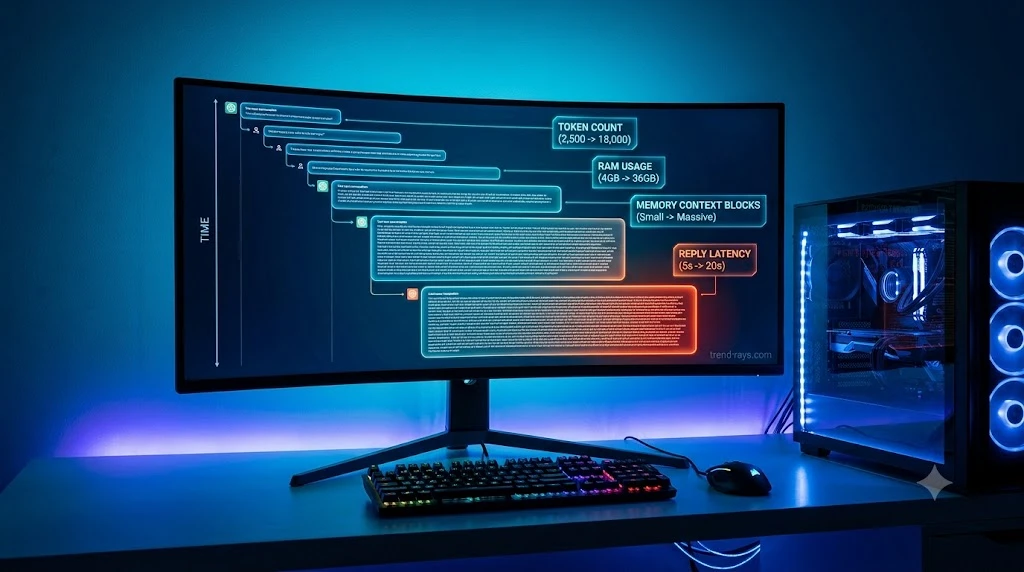
If your local AI starts fast but becomes noticeably slower during long conversations, the problem may not be your hardware—it may be your context window.
This is one of the most overlooked causes of poor local AI performance.
Many users increase the context window to the maximum value, believing it will automatically make the AI smarter.
In reality, an unnecessarily large context window often increases memory usage, slows token generation, and reduces overall responsiveness.
What Is a Context Window?
A context window is the amount of previous information the AI remembers while generating its next response.
Think of it as the AI’s short-term memory.
Every new message you send is added to that memory.
The larger the context window becomes, the more information the model must process before generating each new token.
This additional work requires:
- More RAM
- More VRAM
- Larger KV Cache
- More processing time
As the conversation grows, response times often become progressively slower.
Why Large Context Windows Slow Down Local AI
Unlike cloud AI services that run on powerful server clusters, your local computer has limited memory.
When you set an unnecessarily large context window—for example 32K, 64K, or even 128K tokens—the model reserves significantly more memory, even if your conversation doesn’t actually need it.
That extra memory allocation can lead to:
- Higher RAM usage
- Increased VRAM consumption
- Slower prompt processing
- Longer “thinking” time before the first token appears
- More frequent memory swapping
Many users mistake this behavior for a slow computer when the real issue is simply an oversized context setting.
Signs Your Context Window Is Too Large
You may be using an unnecessarily large context window if:
- Responses become slower as the conversation continues.
- The first reply is reasonably fast, but later replies take much longer.
- RAM usage steadily increases during long chats.
- GPU memory gradually fills up.
- Performance immediately improves after starting a new conversation.
These symptoms usually indicate that the growing conversation history—not your processor—is creating the slowdown.
Do You Really Need a 32K or 128K Context Window?
Probably not.
For most users:
- Casual conversations rarely require more than a few thousand tokens.
- Coding sessions usually benefit from moderate context sizes.
- Long document analysis may require larger contexts.
- Research workflows can justify higher limits.
Increasing the context window “just in case” usually wastes memory without improving answer quality.
Recommended Context Window Sizes
These aren’t strict rules, but they provide a practical starting point for most users.
| Workflow | Recommended Context Window |
|---|---|
| General chatting | 4K–8K tokens |
| Writing and blogging | 8K–16K tokens |
| Programming projects | 16K–32K tokens |
| Large document analysis | 32K+ tokens (only if required) |
Choosing the smallest context that comfortably supports your workflow often results in noticeably faster performance.
Quick Fix
If your AI slows down during longer conversations:
- Reduce the context window to a more realistic value.
- Start a new conversation instead of continuing months-old chats.
- Summarize previous discussions instead of keeping the entire conversation history.
- Close and reopen your AI application if memory usage continues increasing.
- Test the same prompt with a smaller context size and compare response times.
Even a modest reduction in context size can significantly improve responsiveness on systems with limited RAM or VRAM.
Common Mistake
Many beginners assume:
“Bigger context means better AI.”
That’s only partially true.
A larger context allows the model to remember more information, but it also requires substantially more computing resources.
If your workflow doesn’t actually need a massive conversation history, increasing the context window only makes your computer work harder.
Expert Recommendation
Start with the smallest context window that comfortably supports your work.
If you’re writing articles, chatting, learning, or doing everyday coding tasks, a moderate context size is usually the best balance between memory usage and response speed.
Only increase the context window when your workflow genuinely requires the model to remember a large amount of previous information.
A well-optimized 8K or 16K context often delivers a smoother experience than running a 64K context that your hardware struggles to handle.
Reason #4: Your Computer Has Run Out of RAM (And Windows Starts Using the Page File)
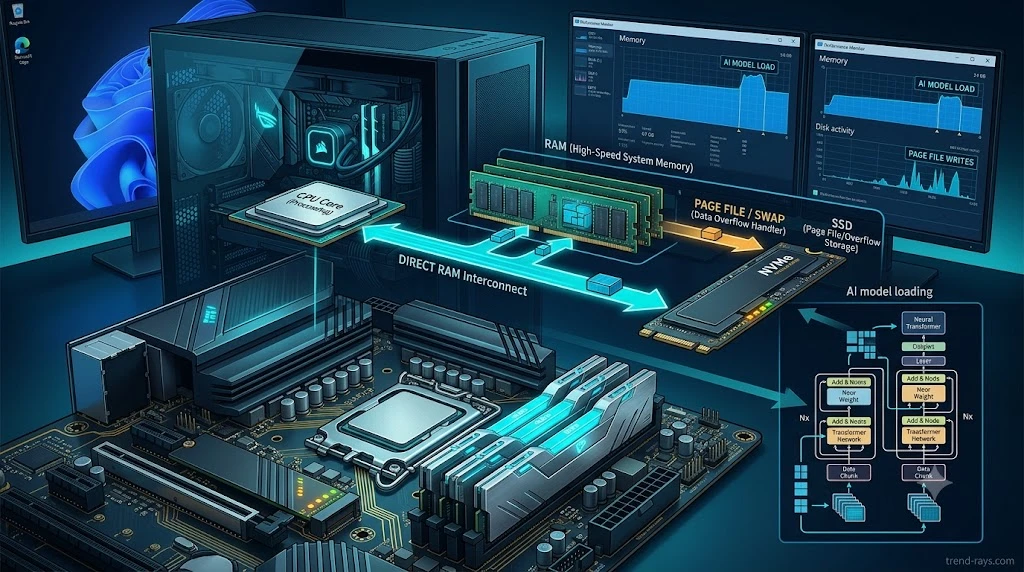
If your entire computer becomes slow—not just your AI application—this is usually the culprit.
Many users focus on CPU usage or GPU utilization while completely ignoring RAM.
However, when your available memory is exhausted, Windows activates something called the page file (also known as virtual memory).
Once this happens, even a high-end processor or graphics card can’t prevent your local AI from slowing down dramatically.
What Is the Windows Page File?
Your computer has two main types of storage for active programs:
- RAM – Extremely fast memory used while applications are running.
- Storage Drive (SSD or HDD) – Permanent storage for files.
When RAM fills up, Windows temporarily moves some of that data from RAM to the storage drive.
This process is called paging or swapping.
Although modern NVMe SSDs are fast, they are still much slower than RAM for active workloads.
As a result, your local AI spends more time waiting for data instead of generating responses.
Why This Slows Local AI
Large Language Models constantly access enormous amounts of data during inference.
When Windows starts moving that data between RAM and the page file:
- Memory access becomes much slower.
- Token generation speed decreases.
- Response latency increases.
- The entire operating system may feel sluggish.
Instead of reading data directly from RAM, the model repeatedly waits for Windows to retrieve information from the SSD.
This creates a noticeable delay before every response.
Signs Your System Is Swapping Memory
If you notice several of these symptoms together, Windows is probably relying on the page file:
- RAM usage remains above 90–95%.
- Disk usage suddenly spikes while generating responses.
- The SSD activity light stays constantly active.
- Applications take longer to switch between.
- Your browser becomes slow while the AI is running.
- Windows occasionally freezes for a few seconds.
- Closing other programs immediately improves AI performance.
Unlike CPU bottlenecks, memory pressure affects the entire computer, not just your AI software.
How to Check RAM Usage
Windows
- Press Ctrl + Shift + Esc to open Task Manager.
- Click the Performance tab.
- Select Memory.
- Watch RAM usage while generating a prompt.
If memory usage stays close to 100%, your system has little room left for the operating system and other applications.
Also check the Processes tab to identify programs consuming large amounts of memory.
You may discover that your browser, video editor, virtual machine, or another background application is competing with your AI model for RAM.
Common Applications That Consume Large Amounts of RAM
Before blaming your AI software, check whether other programs are using memory.
Typical examples include:
- Google Chrome with dozens of tabs open
- Microsoft Edge with sleeping tabs disabled
- Docker containers
- Virtual machines
- Adobe Photoshop
- Premiere Pro
- Visual Studio
- Android emulators
- Multiple Electron-based applications
Closing unnecessary applications can sometimes improve AI performance immediately.
Quick Fix
If your system is running out of RAM:
- Close unnecessary applications before launching your AI software.
- Restart your computer if memory usage remains unusually high.
- Reduce the context window.
- Switch to a smaller AI model.
- Avoid running multiple AI applications simultaneously.
- Keep enough free memory for Windows itself to operate efficiently.
If your workflow regularly exceeds available RAM, upgrading memory may eventually become worthwhile—but only after confirming that RAM is genuinely the bottleneck.
Should You Increase the Windows Page File?
Many users search for guides explaining how to increase the page file size.
Increasing it may prevent “Out of Memory” errors, but it does not make local AI faster.
Think of the page file as an emergency backup—not additional high-speed memory.
If your AI constantly relies on the page file, the better long-term solution is to reduce memory usage or choose a model that fits comfortably within your system’s available RAM.
Expert Recommendation
During troubleshooting, don’t just monitor CPU and GPU usage.
Keep Task Manager open and watch Memory and Disk Activity together.
If RAM remains nearly full while disk usage spikes during inference, you’ve found one of the most common—and most expensive—performance bottlenecks.
In many cases, simply closing unnecessary applications or switching to a more appropriate model delivers a larger performance improvement than upgrading your processor.
Reason #5: You’re Using the Wrong Quantization

One of the easiest ways to make local AI feel faster is also one of the least understood.
It’s called quantization.
If you’ve downloaded a GGUF model, you’ve probably seen names like:
- Q2_K
- Q3_K_M
- Q4_K_M
- Q5_K_M
- Q6_K
- Q8_0
Most beginners have no idea what these mean, so they either download the largest file available or choose one at random.
That decision alone can dramatically affect your AI’s speed, memory usage, and response quality.
What Is Quantization?
Think of quantization as a way of compressing an AI model.
Instead of storing every number with maximum precision, the model stores information more efficiently.
The result:
- Smaller download size
- Lower RAM usage
- Lower VRAM usage
- Faster inference on many computers
The trade-off is that very aggressive quantization can slightly reduce response quality.
For everyday use, however, the difference is often surprisingly small.
Why Quantization Affects Performance
Every AI model has to fit into your available hardware.
A heavily quantized model requires:
- Less RAM
- Less VRAM
- Less bandwidth between memory and processor
That means the model spends less time waiting for data and more time generating responses.
A poorly chosen quantization, on the other hand, may consume significantly more memory than necessary and slow your entire system.
Understanding Common GGUF Quantizations
You don’t need to memorize every format.
A practical understanding is enough.
| Quantization | Memory Usage | Speed | Quality | Best For |
|---|---|---|---|---|
| Q2 | Very Low | Very Fast | Lower | Older or low-memory systems |
| Q3 | Low | Fast | Good | Entry-level hardware |
| Q4_K_M | Moderate | Fast | Excellent balance | Most users |
| Q5_K_M | Moderate-High | Slightly Slower | Very Good | Higher-quality responses |
| Q6 | High | Moderate | Excellent | Powerful systems |
| Q8 | Very High | Slowest | Highest | Systems with abundant RAM and VRAM |
For most people, Q4_K_M offers the best balance between speed, memory usage, and response quality.
Bigger Files Don’t Automatically Mean Better Results
Many users download the largest model file because they assume:
“Larger must be smarter.”
Unfortunately, that’s not always true.
If your hardware struggles to run the model efficiently, you’ll spend far more time waiting than actually using the AI.
A well-optimized Q4 model that answers in three seconds is often far more productive than a Q8 model that takes forty seconds to generate the same response.
How to Choose the Right Quantization
As a general guideline:
8 GB RAM
Choose lighter quantizations such as Q3 or small Q4 models.
16 GB RAM
Q4_K_M is usually the safest and most balanced choice.
32 GB RAM
Q4_K_M or Q5_K_M both perform well depending on your workload.
64 GB+ RAM
You have much more flexibility and can experiment with higher-quality quantizations if response quality is more important than speed.
Quick Fix
If your AI feels slow and memory usage is high:
- Download the same model in Q4_K_M instead of a larger quantization.
- Compare response speed using the same prompt.
- Monitor RAM and VRAM usage before and after switching.
- Keep the version that provides the best balance for your hardware.
Many users are surprised to discover that changing only the quantization improves responsiveness without noticeably affecting answer quality.
Common Mistake
Some users choose the smallest quantization available purely for speed.
Others always choose the largest because they believe it guarantees the best answers.
Neither approach is ideal.
The goal isn’t to use the biggest or the smallest model.
The goal is to use the quantization that matches your computer’s available resources.
Expert Recommendation
If you’re new to local AI, don’t overcomplicate quantization.
Start with Q4_K_M whenever it’s available.
It has become the preferred choice for many users because it delivers an excellent balance of:
- Response speed
- Memory efficiency
- Overall answer quality
Once you’ve established a stable baseline, you can experiment with Q5 or Q6 versions to see whether the additional quality justifies the extra hardware requirements for your specific workflow.
Reason #6: Your Storage Drive Is Becoming the Bottleneck
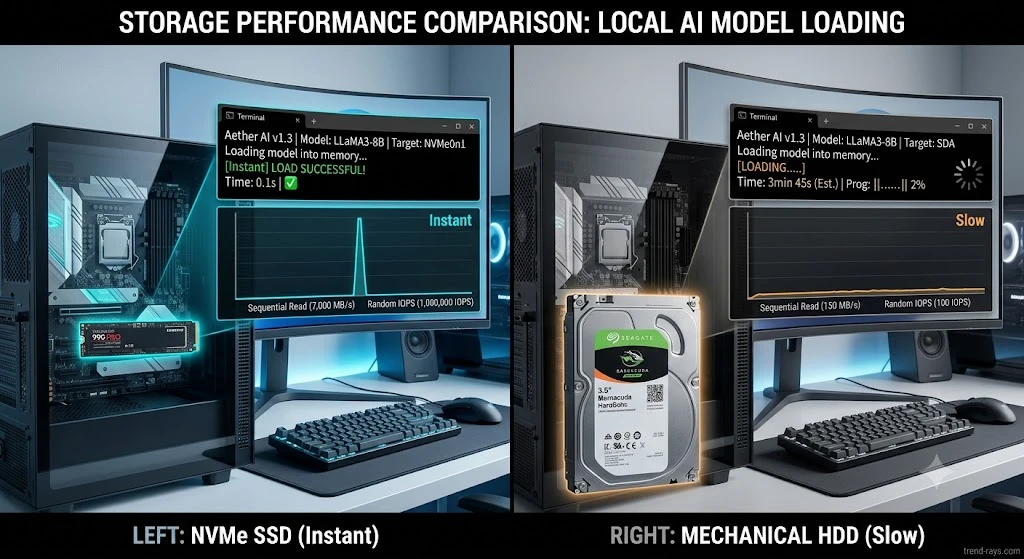
When people think about local AI performance, they usually focus on:
- RAM
- GPU
- CPU
Very few consider the storage drive.
However, your SSD (or hard drive) plays an important role—especially when loading large models and when Windows starts using virtual memory.
If your storage device can’t keep up, your AI may feel much slower than your hardware specifications suggest.
Why Storage Speed Matters
Large language models aren’t small files.
Even a modest 7B model can occupy several gigabytes.
Larger models may require tens of gigabytes of storage.
Every time you:
- Load a model
- Switch models
- Resume a previous session
- Use Windows virtual memory
- Read cached model data
your storage drive is involved.
A slow storage device increases waiting time before inference even begins.
SSD vs HDD
The difference is significant.
| Storage Type | Typical Performance | Local AI Experience |
|---|---|---|
| Mechanical HDD | Slow | Long model loading times and poor overall responsiveness |
| SATA SSD | Good | Suitable for most users |
| NVMe SSD | Excellent | Fast model loading and smoother overall experience |
While storage speed doesn’t directly determine token generation speed, it has a major impact on how quickly models load and how well the operating system responds under memory pressure.
When Storage Becomes a Serious Problem
Storage usually becomes the bottleneck in one of these situations:
Scenario 1 — Windows Starts Swapping Memory
If RAM is full, Windows writes temporary data to the SSD.
The slower the drive, the worse the slowdown becomes.
Scenario 2 — Very Large AI Models
Loading a 30GB model from an older hard drive can take several minutes.
The same model on an NVMe SSD loads much faster.
Scenario 3 — Nearly Full SSD
Many SSDs lose performance when they are almost full.
If your system drive has only a few gigabytes of free space remaining, read and write speeds may decrease noticeably.
Signs Your Storage Is the Problem
Your storage device may be limiting performance if:
- AI models take a long time to load.
- Disk usage remains close to 100% while the model is starting.
- Windows freezes during loading.
- Programs become unresponsive whenever the AI is running.
- You hear constant hard drive activity (for HDD users).
- Everything becomes faster after the model finishes loading.
How to Check Disk Activity
Windows
- Open Task Manager.
- Select the Processes tab.
- Watch the Disk column while loading or running a model.
If disk usage remains close to 100% for extended periods while CPU and GPU usage remain relatively low, storage may be your primary bottleneck.
You can also use Resource Monitor for a more detailed view of disk activity.
Quick Fix
If storage is slowing your local AI:
- Move your AI models to an SSD instead of a mechanical hard drive.
- Keep at least 15–20% free space on your SSD.
- Remove unused models to free storage.
- Avoid running large file transfers while using local AI.
- Reduce RAM usage to minimize Windows paging.
These changes won’t magically double inference speed, but they often make the overall experience much smoother.
Common Mistake
Many users buy a powerful graphics card but continue storing all their AI models on an old mechanical hard drive.
As a result:
- Models load slowly.
- Windows feels sluggish.
- Every new session takes much longer to start.
The GPU isn’t the problem—the storage device is.
Expert Recommendation
If you’re planning your first local AI workstation, prioritize an NVMe SSD for both your operating system and your AI models.
Fast storage won’t replace sufficient RAM or a capable GPU, but it removes one of the most common hidden bottlenecks and significantly improves the overall responsiveness of your local AI workflow—especially when working with larger models or multiple AI applications.
Reason #7: Background Applications Are Quietly Stealing Your System Resources
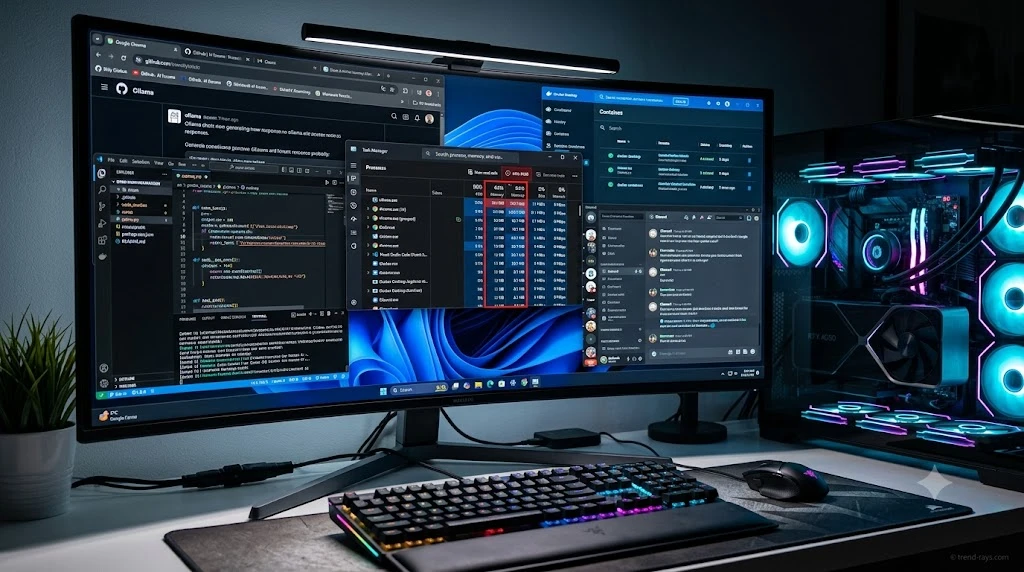
One of the most frustrating things about troubleshooting local AI is that the problem isn’t always the AI software itself.
Sometimes, another application is consuming the resources your model needs.
You may have a powerful computer with:
- 32 GB RAM
- An NVIDIA RTX GPU
- A fast NVMe SSD
Yet your AI still feels sluggish because several background applications are competing for CPU time, RAM, GPU memory, or storage bandwidth.
Unlike gaming, where you usually close unnecessary programs before launching a game, many users run local AI alongside dozens of other applications without realizing the performance impact.
Why Background Applications Matter
Every running application consumes system resources.
Some use only a few megabytes of RAM.
Others reserve several gigabytes without you noticing.
When enough programs run simultaneously, Windows has to divide your computer’s resources between all of them.
Instead of giving your AI model everything it needs, the operating system constantly switches attention between multiple demanding tasks.
The result is:
- Slower token generation
- Longer response times
- Higher memory usage
- Increased CPU scheduling overhead
- More frequent disk activity
Common Applications That Affect Local AI Performance
Some programs have a much larger impact than most people realize.
Web Browsers
Modern browsers can easily consume several gigabytes of RAM.
Having 40–50 Chrome or Edge tabs open while running a local LLM is surprisingly common.
Docker Containers
Developers often leave Docker running in the background.
Even idle containers reserve memory and CPU resources.
Virtual Machines
VMware, VirtualBox, Hyper-V, and similar software can reserve large amounts of RAM even when not actively being used.
Video Editing Software
Applications such as Adobe Premiere Pro, DaVinci Resolve, and After Effects consume significant RAM and GPU memory.
Game Launchers
Steam, Epic Games Launcher, EA App, Ubisoft Connect, and similar software may continue running background services even after games are closed.
Communication Apps
Discord, Microsoft Teams, Slack, Zoom, and similar applications constantly synchronize data and use memory in the background.
Cloud Synchronization
Services such as OneDrive, Google Drive, and Dropbox may suddenly begin syncing large files while your AI is running.
This increases disk activity and can affect overall responsiveness.
Real-World Example
Imagine this setup:
- Chrome with 35 open tabs
- Docker Desktop running
- VS Code open with multiple extensions
- Discord active
- Spotify streaming music
- Ollama loading a 14B model
Individually, none of these applications is a problem.
Together, they may consume:
- Several gigabytes of RAM
- Valuable CPU time
- GPU memory
- Storage bandwidth
The AI model then receives only a fraction of the available system resources.
How to Identify Resource Hogs
Before assuming your AI software is slow, inspect what’s already running.
Windows Task Manager
Open Task Manager and sort applications by:
- Memory
- CPU
- GPU
- Disk
Look for processes consuming unusually large amounts of resources.
You may be surprised by what you find.
Sometimes the largest consumer isn’t your AI application at all.
Quick Fix
Before launching your local AI:
- Close unnecessary browser tabs.
- Exit Docker if you’re not using it.
- Shut down virtual machines.
- Close video editing software.
- Pause cloud synchronization temporarily.
- Disable unnecessary startup applications.
- Restart your computer if you’ve been running demanding workloads for several hours.
These simple steps often free enough resources to noticeably improve AI responsiveness without changing any AI settings.
Common Mistake
Many users monitor only CPU usage.
However, local AI performance depends on the entire system.
A computer can have:
- CPU usage at 40%
- GPU usage at 50%
- Yet still perform poorly because RAM is exhausted or background applications are continuously accessing the storage drive.
Looking at only one hardware metric often leads to incorrect conclusions.
Expert Recommendation
Before investing in new hardware, spend five minutes cleaning up your software environment.
A computer with fewer background processes frequently delivers a better local AI experience than a more powerful system overloaded with unnecessary applications.
As a general rule, treat local AI the same way you would a professional video editing or 3D rendering workload—give it as many system resources as possible for the best results.
Reason #8: Your CPU Has Become the Bottleneck
While many local AI guides focus on GPUs, the CPU still plays a critical role in model loading, prompt processing, token generation (for CPU inference), and coordinating data between system components.
If your processor can’t keep up, your AI may feel sluggish—even if you have plenty of RAM and a capable graphics card.
This is especially common on:
- Older laptops
- Budget desktop processors
- Thin-and-light ultrabooks
- Systems running CPU-only inference
What Does the CPU Actually Do?
Even when your GPU is accelerating inference, your processor is still responsible for tasks such as:
- Loading AI models into memory
- Preparing prompts
- Managing system memory
- Scheduling workloads
- Coordinating GPU operations
- Running the operating system and background services
If you’re running local AI without a dedicated GPU, the CPU performs nearly all of the inference work itself.
CPU vs GPU Inference
Think of the CPU as a highly skilled general-purpose worker.
It can perform many different jobs very well.
A GPU, on the other hand, is designed to perform thousands of similar mathematical operations simultaneously.
Large Language Models involve billions of repeated mathematical calculations.
That’s exactly the type of workload GPUs were built for.
When the CPU has to perform those calculations alone, performance drops significantly.
Signs Your CPU Is the Bottleneck
Your processor may be limiting performance if you notice these symptoms:
- CPU usage stays close to 100% while generating responses.
- GPU usage remains relatively low.
- Every prompt takes a long time to begin generating.
- Response speed doesn’t improve after reducing RAM usage.
- The computer becomes unresponsive while inference is running.
If these symptoms occur consistently, your processor may simply be doing more work than it can comfortably handle.
Single-Core Performance Matters More Than Many People Think
A common misconception is that:
More CPU cores automatically mean faster local AI.
Not always.
Many local AI workloads still depend heavily on strong single-core performance for certain tasks.
For example:
- A newer 8-core processor may outperform an older 16-core processor.
- Modern CPU architecture often matters more than raw core count.
When comparing processors, don’t look only at the number of cores.
Also consider:
- Generation
- Clock speed
- IPC (Instructions Per Clock)
- Cache size
These factors can significantly affect local AI performance.
Laptop CPUs vs Desktop CPUs
Many users compare processors only by model names.
However, laptop processors often operate under much stricter power and thermal limits.
For example:
A desktop processor can sustain high clock speeds for long periods.
A laptop processor may reduce its speed after only a few minutes to prevent overheating.
As a result, two processors with similar names may deliver very different real-world AI performance.
Thermal Throttling
Another hidden performance killer is heat.
When your processor becomes too hot, it automatically reduces its clock speed to protect itself.
This is called thermal throttling.
Common causes include:
- Dust buildup
- Poor airflow
- Thin laptop cooling systems
- High room temperatures
- Running multiple demanding applications simultaneously
A throttling CPU can make local AI progressively slower during longer sessions.
How to Check CPU Performance
On Windows:
- Open Task Manager.
- Select the Performance tab.
- Watch CPU usage while generating responses.
- Monitor clock speed and overall utilization.
If CPU usage remains near 100% throughout inference while GPU usage stays low, your processor is likely the primary bottleneck.
More advanced users can monitor CPU temperature and sustained clock speeds using utilities such as HWiNFO or Core Temp.
Quick Fix
If your CPU is struggling:
- Enable GPU acceleration if your hardware supports it.
- Use a smaller AI model.
- Choose a more memory-efficient quantization.
- Close CPU-intensive background applications.
- Improve system cooling by cleaning fans and ensuring proper airflow.
- Restart the computer before long AI sessions.
Even small reductions in CPU workload can noticeably improve responsiveness.
Common Mistake
Many users assume:
“My processor is only two years old, so it can’t be the problem.”
Processor age alone doesn’t determine performance.
A newer entry-level CPU may perform worse than an older high-end processor.
Likewise, a powerful desktop CPU often outperforms a similarly named laptop processor because it can maintain higher performance for longer periods.
Always evaluate real-world performance rather than relying solely on model numbers.
Expert Recommendation
If your local AI relies primarily on CPU inference, don’t judge performance by task manager percentages alone.
Look at the entire picture:
- Is the CPU constantly at 100%?
- Is the GPU sitting idle?
- Is the processor overheating?
- Are background applications competing for CPU time?
Answering these questions helps identify whether upgrading hardware is actually necessary—or whether better software configuration can solve the problem first.
For many users, enabling proper GPU acceleration or switching to a smaller model provides a much larger improvement than replacing the processor.
Reason #9: Your GPU Doesn’t Have Enough VRAM
Many users assume that once their AI software detects their graphics card, the entire model is running on the GPU.
Unfortunately, that’s not always true.
Your GPU may be recognized correctly, but if it doesn’t have enough VRAM (Video Memory) to hold the model, your AI software has to move part of the workload back to system RAM and the CPU.
This mixed approach is called partial GPU offloading, and while it allows larger models to run, it often comes with a noticeable performance penalty.
What Is VRAM?
VRAM (Video Random Access Memory) is dedicated memory located on your graphics card.
Unlike system RAM, VRAM is designed specifically for graphics processing and AI workloads.
When running local AI, VRAM stores:
- AI model layers
- KV Cache (depending on the application)
- Temporary tensors
- Intermediate calculations
The more of the model that fits inside VRAM, the less frequently the system has to transfer data between the GPU and system memory.
Why Insufficient VRAM Slows Everything Down
Imagine reading a book where half the pages are on your desk and the other half are in another room.
Every few seconds, you have to walk to the other room, retrieve a page, and return before continuing.
That’s essentially what happens when an AI model doesn’t fully fit inside GPU memory.
The GPU processes one part.
The CPU processes another.
Data constantly moves between:
- VRAM
- System RAM
- CPU
These transfers introduce latency and reduce overall throughput.
Signs You Don’t Have Enough VRAM
Your graphics card may be running out of memory if:
- GPU memory usage stays at or near 100%.
- The model loads successfully but generates text very slowly.
- Smaller models perform dramatically better than larger ones.
- GPU utilization fluctuates heavily instead of remaining consistent.
- CPU usage increases even though GPU acceleration is enabled.
- The software reports that only part of the model is offloaded to the GPU.
These symptoms usually indicate that your graphics card simply cannot hold the entire model.
How to Check VRAM Usage
Windows
You can monitor VRAM usage by:
- Opening Task Manager.
- Selecting the Performance tab.
- Choosing your GPU.
- Watching Dedicated GPU Memory while generating responses.
If dedicated memory remains completely full throughout inference, you’ve likely reached your VRAM limit.
More advanced users can also monitor VRAM usage using tools such as:
- GPU-Z
- MSI Afterburner
- NVIDIA’s
nvidia-smi
These utilities provide more detailed information about memory allocation and GPU utilization.
Typical VRAM Recommendations
While requirements vary depending on the model and quantization, these general guidelines are useful.
| Available VRAM | Recommended Models |
|---|---|
| 4 GB | Small 2B–4B models |
| 6 GB | Optimized 7B models with lighter quantizations |
| 8 GB | Most 7B models comfortably |
| 12 GB | 8B–13B models (depending on quantization) |
| 16 GB+ | Larger models with more GPU offloading |
These aren’t fixed limits, but they provide a realistic expectation for smooth performance.
Don’t Judge a GPU by Its Total Memory Alone
Two graphics cards may both have 8 GB of VRAM.
That doesn’t mean they’ll deliver identical AI performance.
Performance also depends on:
- Memory bandwidth
- GPU architecture
- CUDA cores (NVIDIA)
- Compute units (AMD)
- Driver optimization
- AI framework support
A modern GPU with the same amount of VRAM can significantly outperform an older model.
Quick Fix
If VRAM is your bottleneck:
- Use a smaller AI model.
- Choose a more memory-efficient quantization such as Q4_K_M.
- Reduce the context window.
- Close GPU-intensive applications like games or video editors.
- Enable GPU offloading only for the number of layers your VRAM can comfortably handle.
- Restart your AI application after changing models or settings.
These adjustments often improve performance without requiring new hardware.
Common Mistake
Many users assume:
“If the model loads, my GPU has enough memory.”
Loading successfully doesn’t necessarily mean the entire model fits inside VRAM.
Many inference engines automatically split the workload between the GPU and CPU when VRAM is insufficient.
The model works—but much more slowly than expected.
Expert Recommendation
Aim to keep enough free VRAM so that your AI model can run comfortably without constantly moving data between the GPU and system memory.
A slightly smaller model that fits entirely within VRAM almost always delivers a smoother and more responsive experience than a larger model that exceeds your graphics card’s memory capacity.
When choosing between model size and smooth performance, prioritize the configuration that allows your GPU to work efficiently rather than operating at its absolute limit.
Reason #10: Your AI Software Isn’t Configured Correctly
You can have:
- Plenty of RAM
- A powerful GPU
- A fast NVMe SSD
- A modern processor
…and your local AI can still perform poorly.
Why?
Because the software itself may not be configured efficiently.
Applications like Ollama, LM Studio, Open WebUI, Jan, and KoboldCpp provide dozens of settings that directly affect performance.
Many users install the software, download a model, and never change a single configuration option.
While the default settings are usually safe, they aren’t always optimized for your specific hardware.
Software Configuration Matters More Than Most People Realize
Every local AI application has to decide:
- How many model layers should run on the GPU?
- How many CPU threads should be used?
- How much memory should be reserved?
- Should model files be memory-mapped?
- Should Flash Attention be enabled (where supported)?
- How should prompts be processed?
Poor choices in these settings can easily reduce performance—even on high-end systems.
GPU Layer Offloading
One of the most important settings is GPU layer offloading.
Instead of forcing the entire model onto the CPU, many inference engines allow certain layers to run on the GPU.
If too few layers are offloaded:
- CPU usage becomes very high.
- GPU remains underutilized.
- Response times increase.
If too many layers are offloaded:
- VRAM fills completely.
- The application starts moving layers back into system memory.
- Performance may actually become worse.
The goal is balance, not simply using the maximum possible number of GPU layers.
CPU Thread Count
Many applications allow you to choose how many CPU threads are used.
A common beginner mistake is assuming:
“More threads always mean faster AI.”
Not necessarily.
Using every available thread can:
- Increase heat.
- Cause more scheduling overhead.
- Reduce system responsiveness.
- Produce inconsistent performance.
For many systems, leaving the application on its recommended automatic setting delivers the best results.
Memory Mapping (mmap)
Some inference engines support memory mapping, often shown as mmap.
Instead of loading the entire model into RAM immediately, memory mapping allows the operating system to load portions of the model as needed.
Benefits include:
- Faster startup.
- Lower initial RAM usage.
- Better handling of very large models.
Unless you have a specific reason to disable it, keeping memory mapping enabled is generally the better choice.
Flash Attention
Some modern inference engines also support Flash Attention.
When supported by both your hardware and software, Flash Attention can:
- Reduce memory usage.
- Improve token generation speed.
- Increase inference efficiency.
Availability depends on:
- GPU architecture
- Drivers
- Software version
- AI framework
If your application offers this feature and your hardware supports it, enabling it may improve overall performance.
Keep Your Software Updated
Performance improvements don’t always come from new hardware.
Developers frequently release updates that include:
- Better GPU utilization
- Improved memory management
- Faster inference engines
- Bug fixes
- Support for newer AI models
Running an outdated version of your AI software may prevent you from benefiting from these optimizations.
Quick Configuration Checklist
Before blaming your hardware, verify these settings:
- GPU acceleration is enabled.
- GPU layer offloading is configured appropriately.
- Memory mapping is enabled (where available).
- Flash Attention is enabled if supported.
- CPU thread count isn’t unnecessarily high.
- You’re using the latest stable version of the application.
- Graphics drivers are up to date.
Spending a few minutes reviewing these settings often produces larger improvements than users expect.
Common Mistake
Many users search for:
“Best LM Studio settings”
or
“Best Ollama settings.”
There is no single configuration that works for every computer.
The best settings depend on:
- Available RAM
- VRAM capacity
- Processor
- Storage speed
- Model size
- Quantization
Copying someone else’s configuration without considering your own hardware often leads to disappointing results.
Expert Recommendation
Treat your AI software the same way you would a professional application like a video editor or 3D renderer.
Spend a little time understanding its settings instead of leaving everything at the defaults.
A properly configured inference engine can often deliver noticeably faster responses without changing your hardware, downloading a different model, or reinstalling the application.
Think of software optimization as getting free performance from the computer you already own.
Reason #11: You’re Using an Outdated Model or Inference Engine
Many people assume that once they’ve downloaded a local AI model, they’re finished.
In reality, the local AI ecosystem evolves incredibly quickly.
New versions of:
- AI models
- GGUF files
- Inference engines
- GPU acceleration libraries
- AI frameworks
are released regularly.
Sometimes, simply updating your software can improve performance without changing your hardware at all.
Why Updates Matter
The local AI community is constantly optimizing models and inference engines.
Developers frequently release improvements that:
- Generate tokens faster.
- Reduce RAM usage.
- Improve GPU utilization.
- Fix compatibility issues.
- Load models more efficiently.
- Improve quantization quality.
This means an older model running on an older inference engine can be noticeably slower than the latest optimized version.
It’s Not Just the AI Model
Most users think only about downloading newer models.
However, performance also depends on the software that runs them.
For example:
- Ollama receives frequent performance improvements.
- LM Studio regularly updates its inference engine.
- llama.cpp continuously introduces speed optimizations.
- GPU libraries become more efficient over time.
Even if you’re using the exact same model, updating the software underneath it can produce better performance.
Older GGUF Files May Not Be Optimized
Many AI models are republished over time.
The original release might use:
- Older quantization techniques
- Older conversion methods
- Less efficient metadata
Newer GGUF releases often include:
- Better quantization
- Improved compatibility
- Faster loading
- More efficient memory usage
Downloading an updated version of the same model may provide better real-world performance.
Signs You’re Running Outdated Software
You may be using outdated components if:
- Your software hasn’t been updated for several months.
- Other users report much faster performance using the same hardware.
- Newer models require features your application doesn’t support.
- GPU acceleration behaves inconsistently.
- You encounter frequent crashes or compatibility errors.
How to Update Safely
Instead of downloading everything at once, update one component at a time.
A sensible order is:
- Update your graphics drivers.
- Update your AI application.
- Update your inference engine if applicable.
- Test your existing model.
- Only then experiment with newer model releases.
Changing too many variables simultaneously makes troubleshooting much harder.
Should You Always Use the Newest Model?
Not necessarily.
Newer doesn’t always mean better for your hardware.
Some newer models:
- Require more RAM.
- Need additional VRAM.
- Use larger context windows.
- Prioritize reasoning quality over speed.
If your computer already runs a well-optimized model comfortably, upgrading solely because a newer version exists may not improve your experience.
Quick Fix
If your local AI performance seems unusually poor:
- Check whether your AI application has an update available.
- Compare your installed model version with the latest recommended release.
- Update GPU drivers from the official manufacturer.
- Read the release notes before upgrading.
- Benchmark performance before and after each update.
This helps you identify which update actually improves performance.
Common Mistake
Many users chase every newly released model.
They spend more time downloading multi-gigabyte files than actually using local AI.
A stable, well-configured setup usually provides more productivity than constantly switching to the latest release.
Focus on solving your workflow, not collecting models.
Expert Recommendation
Treat your local AI setup like any professional software environment.
Keep your applications reasonably up to date, but avoid upgrading everything the moment a new release appears.
If your current setup is stable, fast, and produces high-quality results, update strategically rather than impulsively.
The goal isn’t to own the newest model—it’s to have the fastest and most reliable workflow for your specific hardware.
Reason #12: Your Expectations Don’t Match Your Hardware
This may be the hardest truth to accept, but it’s also one of the most important.
Not every computer is capable of delivering ChatGPT-like performance when running large AI models locally.
Cloud AI services such as ChatGPT, Claude, and Gemini run on enterprise-grade servers equipped with:
- Multiple high-end GPUs
- Hundreds of gigabytes of RAM
- Ultra-fast storage
- Specialized AI accelerators
- Optimized inference infrastructure
Your personal computer—even a powerful gaming PC—is working with a fraction of those resources.
That doesn’t mean local AI isn’t worth using.
It simply means choosing realistic expectations and matching your workflow to your hardware.
Local AI Performance Depends on the Entire System
Many users focus on a single specification:
“I have an RTX graphics card.”
or
“I have 32 GB RAM.”
In reality, local AI performance depends on the combination of:
- CPU
- GPU
- VRAM
- System RAM
- Storage speed
- Model size
- Quantization
- Context window
- Software configuration
A weakness in any one of these areas can become the limiting factor.
Local AI is only as fast as its slowest bottleneck.
Laptop Hardware Isn’t the Same as Desktop Hardware
A common misconception is that processors or graphics cards with similar names perform identically.
For example:
- A desktop RTX 4070 generally delivers much higher sustained performance than a laptop RTX 4070.
- A desktop Core i7 often maintains higher clock speeds than its mobile counterpart.
- Laptop cooling systems usually have much tighter thermal limits.
As a result, laptops often reduce performance during long AI sessions to control heat and power consumption.
Bigger Models Aren’t Always the Best Choice
It’s tempting to download the largest available model because it promises better reasoning or higher benchmark scores.
However, if that model pushes your hardware beyond its limits, you’ll spend more time waiting than working.
In many real-world situations:
- A fast 7B model is more productive than a slow 30B model.
- A responsive workflow leads to better overall results.
- Smaller, optimized models encourage experimentation and faster iteration.
The “best” model is the one that performs well on your computer—not necessarily the one with the highest parameter count.
Define Success Based on Your Workflow
Instead of comparing your setup with cloud AI services, ask:
Are you writing blog posts?
A responsive 7B or 8B model may be all you need.
Are you learning programming?
Medium-sized models often provide excellent coding assistance without overwhelming your hardware.
Are you summarizing documents?
Efficient quantized models usually deliver a better experience than oversized models that struggle to load.
Are you experimenting with advanced reasoning?
Larger models may provide better results, but they also demand significantly more hardware resources.
The right choice depends on the task—not just the benchmark.
A Better Way to Think About Local AI
Instead of asking:
“Can my PC run the biggest model?”
Ask:
“Which model gives me the best balance of speed, quality, and responsiveness?”
That small shift in mindset often leads to a much more enjoyable experience.
The goal isn’t to impress people with model size.
The goal is to build a workflow that helps you get work done efficiently.
Quick Reality Check
If your local AI setup:
- Responds within a few seconds,
- Produces reliable answers,
- Doesn’t freeze your computer,
- Lets you work comfortably,
then it’s already performing well.
You don’t need to chase the largest model or the newest hardware if your current setup meets your daily needs.
Expert Recommendation
Don’t compare your local AI setup to cloud services running on enterprise hardware.
Instead, optimize for your own workflow.
A well-configured mid-range computer running the right model can outperform an expensive workstation that’s overloaded with an unnecessarily large model.
The most productive local AI setup isn’t the most powerful one.
It’s the one that lets you work quickly, consistently, and without frustration.
Complete Local AI Performance Troubleshooting Checklist
If you’ve read through the 12 causes above but still aren’t sure what’s slowing your local AI, use this step-by-step checklist.
Work through each item in order.
Most users find the root cause before reaching the end of the list.
Step 1: Check Your Model Size
Ask yourself:
- Is the model appropriate for my hardware?
- Am I trying to run a 14B or 30B model on a 16 GB system?
- Would a smaller model perform better?
Action
✔ Test the same prompt with a smaller model.
If performance improves dramatically, you’ve found your bottleneck.
Step 2: Verify GPU Acceleration
Open Task Manager while generating a response.
Check:
- Is GPU Compute being used?
- Is CPU sitting at 100%?
- Is GPU mostly idle?
Action
✔ Enable GPU acceleration or GPU layer offloading.
Step 3: Monitor RAM Usage
Open:
Task Manager → Performance → Memory
Look for:
- RAM above 90%
- System becoming sluggish
- Windows using virtual memory
Action
✔ Close unnecessary applications or use a smaller model.
Step 4: Check VRAM Usage
Monitor:
- Dedicated GPU Memory
- GPU utilization
Questions:
- Is VRAM completely full?
- Is only part of the model offloaded?
Action
✔ Reduce model size or use a lighter quantization.
Step 5: Review Context Window
Ask:
- Do I really need a 64K context?
- Is my conversation hundreds of messages long?
Action
✔ Reduce the context window.
✔ Start a new conversation.
Step 6: Review Quantization
Which version are you running?
- Q2
- Q3
- Q4
- Q5
- Q6
- Q8
Action
For most users:
✔ Try Q4_K_M first.
It usually provides the best balance between quality, speed, and memory usage.
Step 7: Check Disk Activity
Open:
Task Manager
↓
Processes
↓
Disk
If disk usage remains close to 100% while your AI is generating text, Windows may be relying on the page file.
Action
✔ Free storage space.
✔ Move models to an SSD.
✔ Reduce RAM usage.
Step 8: Close Resource-Hungry Applications
Before launching local AI, close:
- Chrome tabs you don’t need
- Docker
- Virtual machines
- Video editing software
- Games
- Background launchers
Every gigabyte of RAM you recover gives your AI more room to work efficiently.
Step 9: Review Software Settings
Check whether your application has:
- GPU offloading enabled
- Flash Attention (if supported)
- Memory mapping enabled
- Reasonable CPU thread settings
Don’t assume the default configuration is the best one for your hardware.
Step 10: Update Your Software
Verify that you’re using:
- The latest stable version of your AI application
- Current graphics drivers
- Updated inference engine
- Recent GGUF model release
Many performance improvements arrive through software updates rather than new hardware.
Step 11: Restart and Benchmark
After making changes:
- Restart your AI application.
- Use the same prompt.
- Compare:
- Time to first token
- Overall response speed
- RAM usage
- GPU usage
- CPU usage
Changing multiple settings at once makes it difficult to identify what actually improved performance.
Step 12: Decide Whether You Actually Need New Hardware
Only consider upgrading hardware after completing the previous steps.
Many users discover that configuration changes alone solve their performance problems.
If your workflow still isn’t meeting your needs after proper optimization, then upgrading RAM, VRAM, or your processor becomes a much more informed decision.
Quick Diagnostic Summary
Use this table to quickly match the symptom with the most likely cause.
| Symptom | Most Likely Cause | First Thing to Try |
|---|---|---|
| AI is slow immediately after loading | Model is too large | Try a smaller model |
| AI slows during long conversations | Context window too large | Reduce context size |
| CPU remains near 100% | CPU inference | Enable GPU acceleration |
| GPU usage stays near 0% | GPU not configured | Check GPU settings |
| RAM exceeds 90% | Memory bottleneck | Close applications or reduce model size |
| Disk stays near 100% | Windows paging | Free RAM and use an SSD |
| GPU memory is completely full | VRAM bottleneck | Use a lighter quantization |
| Everything on Windows becomes slow | System resource contention | Close background applications |
If You Only Remember Three Things
If you don’t have time to optimize everything, remember these three rules:
- Choose the right model for your hardware—not the biggest model available.
- Make sure your GPU is actually being used.
- Monitor RAM, VRAM, CPU, and Disk together instead of focusing on only one resource.
Following these three principles alone solves a surprisingly large percentage of local AI performance problems.
Frequently Asked Questions
Why is my local AI so much slower than ChatGPT?
ChatGPT runs on enterprise-grade servers equipped with multiple high-performance GPUs, large amounts of RAM, and highly optimized infrastructure. Local AI runs on your own computer, which has much more limited resources. The goal isn’t to match cloud performance but to optimize your setup so it performs efficiently on your hardware.
Does more RAM make local AI faster?
More RAM can improve performance if your current system is running out of memory. However, adding RAM won’t help if your actual bottleneck is your GPU, processor, storage drive, or software configuration.
Is 16 GB RAM enough for local AI?
Yes, for many users.
A 16 GB system can comfortably run many optimized 7B and 8B models, especially when using efficient quantizations such as Q4_K_M.
Running larger models may require compromises in speed or context size.
Do I need a dedicated GPU to run local AI?
No.
Most local AI software can run entirely on the CPU.
However, a dedicated GPU usually provides significantly faster inference, especially for larger models.
Why is my GPU detected but still barely being used?
This usually happens because:
- GPU acceleration isn’t fully enabled.
- The model doesn’t fit entirely into VRAM.
- GPU layer offloading is configured incorrectly.
- Drivers are outdated.
Monitoring GPU Compute activity while generating responses can help identify the issue.
What is the best quantization for beginners?
For most users, Q4_K_M offers the best balance between:
- Speed
- Memory usage
- Response quality
It’s a practical starting point before experimenting with larger or smaller quantizations.
Does an SSD make local AI faster?
An SSD mainly improves:
- Model loading times
- System responsiveness
- Memory swapping performance
It doesn’t directly increase token generation speed, but it greatly improves the overall user experience compared to a traditional hard drive.
Why does my AI become slower during long conversations?
Long conversations increase the amount of context the model has to process.
As the context grows:
- More RAM is used.
- More VRAM may be required.
- Prompt processing takes longer.
Starting a new conversation or reducing the context window often restores performance.
Should I always download the largest available model?
No.
A model that comfortably fits your hardware usually provides a much better experience than a larger model that constantly struggles with memory limitations.
The best model is the one that balances speed, quality, and responsiveness for your system.
Can I improve local AI performance without upgrading my hardware?
Absolutely.
Many users see significant improvements by:
- Choosing a smaller model.
- Using a better quantization.
- Reducing the context window.
- Enabling GPU acceleration.
- Closing background applications.
- Updating their AI software.
These optimizations often provide larger gains than expected.
Why is CPU usage at 100% while my GPU is idle?
This usually indicates that inference is running primarily on the processor instead of the graphics card.
Check your AI application’s GPU settings and verify that GPU acceleration is enabled.
How much VRAM do I need?
The answer depends on:
- Model size
- Quantization
- Context window
- Inference engine
Generally, more VRAM allows you to run larger models with greater GPU acceleration, but efficient model selection is often more important than simply having more memory.
Is local AI worth using on older computers?
Yes.
Older hardware can still provide an excellent experience when paired with smaller, optimized models.
Instead of focusing on the largest available models, choose one that matches your system’s capabilities.
Should I keep updating my local AI software?
Yes—but strategically.
Performance improvements, bug fixes, and better hardware support are released frequently.
Update to stable releases, benchmark your performance afterward, and avoid changing multiple components at once.
What’s the fastest way to improve local AI performance?
For most users, the biggest improvements come from these three changes:
- Choose a model that fits comfortably within your RAM and VRAM.
- Verify that GPU acceleration is working correctly.
- Reduce unnecessary memory usage by closing background applications and lowering the context window if needed.